In this post I will demonstrate how to setup a Drupal 7 site from scratch using Pantheon. Then, using Load Impact, I will attempt to compare the performance of Pantheon versus other Drupal-based platforms (Aberdeen Cloud platform and VPS).
Pantheon
For those who don’t know Pantheon, it’s a cloud platform for web development using different frameworks such as Drupal or WordPress. It provides development, testing and live environments for easy deployment using git. And since it’s built using containers instead of virtual machines, it’s performance and scalability is considerably better than traditional hosting providers.

Pantheon also provides a platform with preconfigured tools such as Varnish, Redis, Apache Solr, automated backups and application updates, etc.
For this performance test, we are going to need to create a Pantheon user account.
As a registered Pantheon user, we now see the Pantheon control panel:

Now we need to create a site in order to install Drupal and run a performance test.
Steps to creating a Drupal 7 site using Pantheon
1. After registering an account with Pantheon, click “Create a site now” link.

2. Next, provide some information about the site, such as the name and the access URL. Later, you can easily redirect your existing domain if you need it.
Press the “Create Site” button to continue with the process.

3. Create or import a site
You can create a site from scratch using one of the available web application cores for Drupal or WordPress, or you can import an existing one – packing your application files and database dump.
For this test, we are going to start a Drupal 7 site from scratch, but feel free to import your existing application if you want to compare its performance in Pantheon.
Select “Start from scratch” option and one of the available cores – in this case Drupal 7.
Press “Install Drupal 7” button to continue with the site installation.
Pantheon will setup the site with the best suitable configuration for Drupal 7.

4. Use the dashboard and configure your application
Once the site is completely installed you will have access to the site Dashboard where you can configure different aspects of your application, create backups and use the Pantheon tools.

Now it’s time to install Drupal. As you can see, the site installer only copied Drupal 7 files but it didn’t execute Drupal installation.
You have to do it manually, so just press “Visit Development Site” button.

5. Install Drupal
In this case, you are going to install Drupal 7 using a Pantheon profile – a custom Drupal distribution preconfigured with Pantheon modules and custom configuration that enables Drupal caching and provides better performance, and an Apache Solr integration.
Press “Save and continue” button to go to next installation step where you can select default language for Drupal. You can install Drupal 7 in other languages – but that can be done later.
Press “Save and continue” button again and Drupal will install with pre-selected Pantheon configuration.
After the installation you have to configure site details, such as site name or administrator username, password and email.
Once you’ve completed the form details, Drupal should be installed and ready to use.

6. Start using Drupal
To start using Drupal just press “Visit your new site” link and you will access your brand new Drupal 7 website.
7. Setup your git repository in your local machine
Now it’s time to set up your git repository in your local machine so you can add or modify your Drupal website.
First of all, you need to add your SSH public key into your Pantheon user account. Just go to “Sites & Account” in your user menu.

If you don’t already have a SSH key you have to create it. You can find more information about SSH key generation here: http://helpdesk.getpantheon.com/customer/portal/articles/366938-generate-ssh-keys
Once you have created your SSH key, you should add your Public Key just by pressing the “Add key” button. For more information about SSH keys, visit this page: http://helpdesk.getpantheon.com/customer/portal/articles/361246-loading-ssh-keys
Now you can connect to Pantheon git repository using SSH.
8. Configure the repository in your local machine
To configure the repository in your local machine you should have git previously configured. If you need to install git just follow this guide for all platforms https://help.github.com/articles/set-up-git
First you should copy the path to connect to your server using SSH, because you are going to need it later. You can find it in your project dashboard.

We are going to use Git as connection mode so be sure that it’s selected and copy the URL you find in the textbox. As you can see in the following screenshot:
![]()
Go to your terminal and execute the following command from the location where you want to create your project repository folder (Don’t forget to use the URL you previously copied):
$ git clone ssh://codeserver.dev.xxx@codeserver.dev.xxx.drush.in:2222/~/repository.git drupal-loadimpact
If everything goes well, the command will create a folder named drupal-loadimpact with all the files corresponding to Drupal 7 core.
9. Install devel module
Now we are going to install devel module. This Drupal module will help us to creat thousands of nodes in our Drupal website.
A node is a Drupal piece of content with multiple fields and properties, and we are going to use them for our performance test.
You can download the module using wget or drush, but remember to place the module files into sites/all/modules directory in your repository folder.
Then add the new files for commit using the following command:
$ git add sites/all/modules/devel
Commit the changes into your local repository using a descriptive message:
$ git commit -m"Added devel module."
And finally push the changes to the remote repository:
$ git push origin master
You can check that everything went well by checking the commit log in your project dashboard.
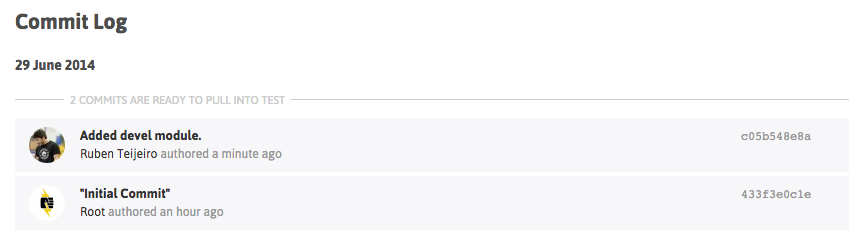
You can see the new commit with your descriptive message.
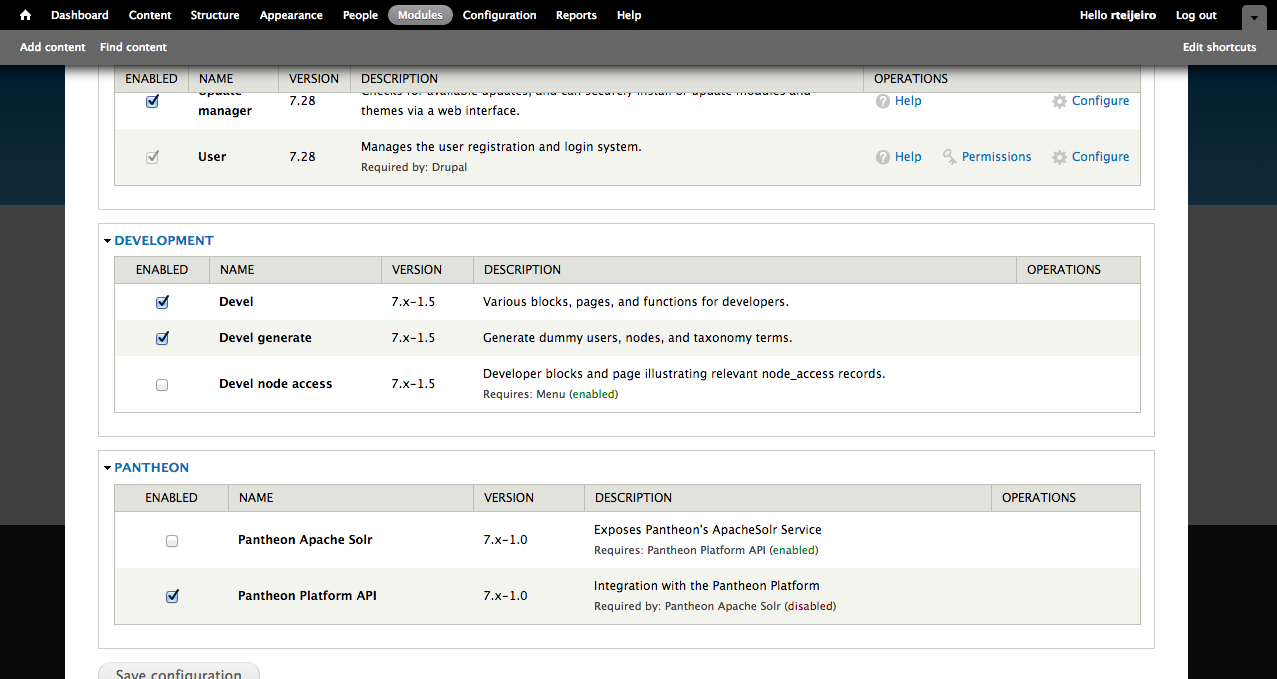
10. Install devel module by enabling it in Drupal
Select “Modules” menu option from the top menu in your Drupal site.
Enable only Devel and Devel generate modules.
11. Generate content
Now select “Configuration” menu option from the top menu. And then select “Generate content” option.

In this example, we are going to create 5000 nodes of type Article for our performance test. It should be enough to have a high amount of content in the Drupal database and create different performance tests.

Press “Generate” button and relax because it’s going to take a while. You can take a cup of coffee 😉
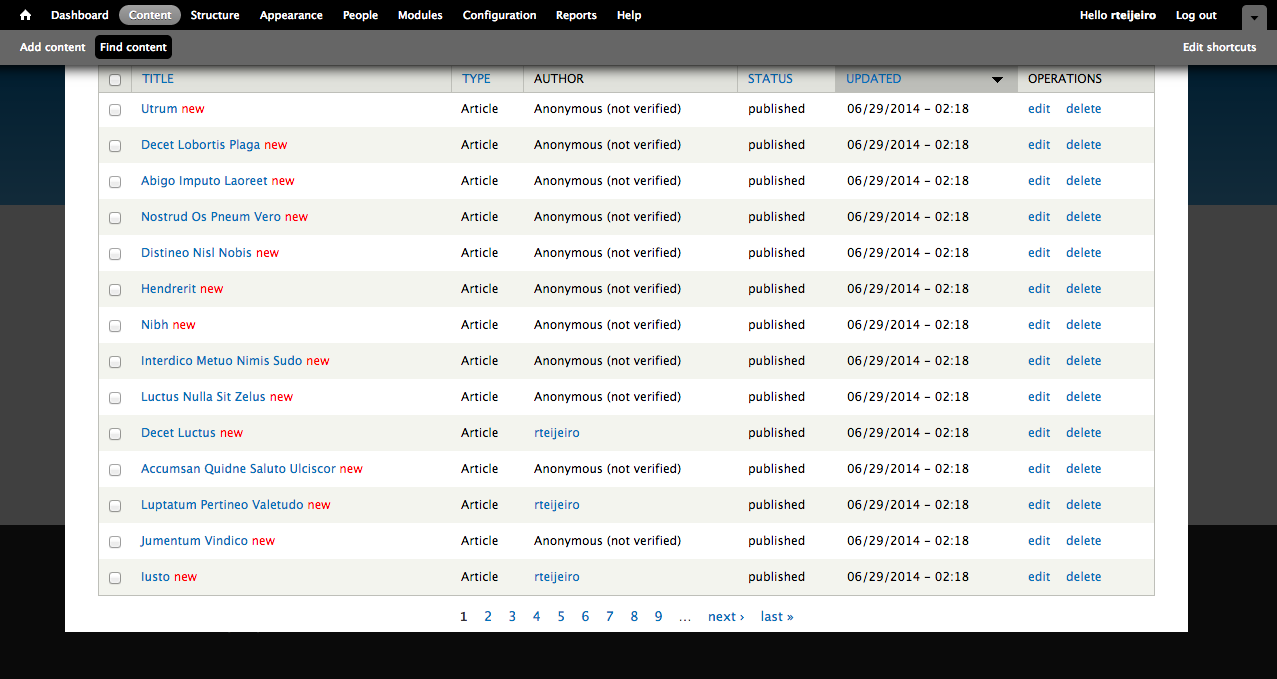
…. (coffee break)
So, here you have your 5000 recently created articles. To see them just select “Content” from the top menu.
12. Create page listing all content (for performance testing purposes)
Now we are going to create a page that will list all the content so it will create a high amount of database queries and render a lot information in the page.
For that we will need Views (https://www.drupal.org/project/views) and Chaos Tools Suite (https://www.drupal.org/project/ctools) modules.
You can download them using the same method you used to download Devel module. Don’t forget to place them in sites/all/modules folder to let Drupal to find them and be able to install them.
Once you have downloaded the modules into your local repository, you can add and commit the modules into your local repository as we did before:
$ git add sites/all/modules/views
$ git commit -m”Added views module.”
$ git add sites/all/modules/ctools
$ git commit -m"Added ctools module."
Now push the changes to your remote repository:
$ git push origin master
Once again, you can see your commits in the Commit Log in your project dashboard and verify that everything went well.
To enable the modules, select “Modules” option in your top menu:
Enable Chaos tools module because it’s a dependency of Views module:
![]()
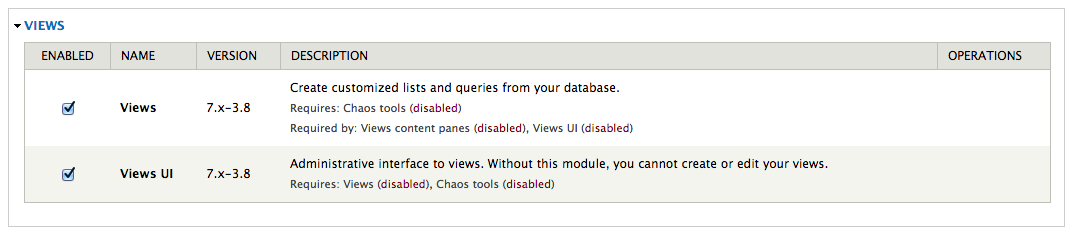
Also enable Views and Views UI modules:
Now select “Structure” option form the top menu to start creating your view page.
Then select “Views” option.
On this page you can find a list of preconfigured views. We are going to create our own view page with a list of a specific number of content articles.

13. Create and configure a new View
Select “Add new view” link to start.
Create a new view using the following configuration and press “Continue & edit” button.

This page is the configuration panel for your view. You can add fields, sorting order and filters as well as arguments and other custom features.

We are going to add a few fields to display more content in the page.
Now you can see that there is only Title field available. Press the “Add” button in “Fields” section.
In the next window select Body and Image fields and press “Apply (all displays)” button with default settings for all fields.

Now your “Fields” section should contain the following:
- Content: Title
- Content: Body(body)
- Content: Image(image)
Press “Save” button to save your new view.
14. Visit your new page
Now you should be able to visit your page. The page we created for testing is here: http://dev-drupal-loadimpact.gotpantheon.com/performance-test
You should see a page with 100 article nodes – which is a normal amount of data for Drupal to load.
It will create a considerable number of database queries and processes to render all the content into the page.
Consider to increase or decrease the number of items in the “Pager” section of your view if you want to test with different amount of data loaded.
You can select different values to adapt the performance test to your real needs.

We have to take into consideration the default configuration that Pantheon profile applies to Drupal.
If you select “Configuration” in the top menu you can find “Performance” menu item:

In this page you can find configuration settings related to Drupal performance. You can see that there are a few settings already enabled.
Page and block caches are enabled for 15 minutes. Also, CSS and JavaScript are aggregation is enable – what packs all CSS and JavaScript files and build them together in order to decrease the number of requests to the server to download all the files.
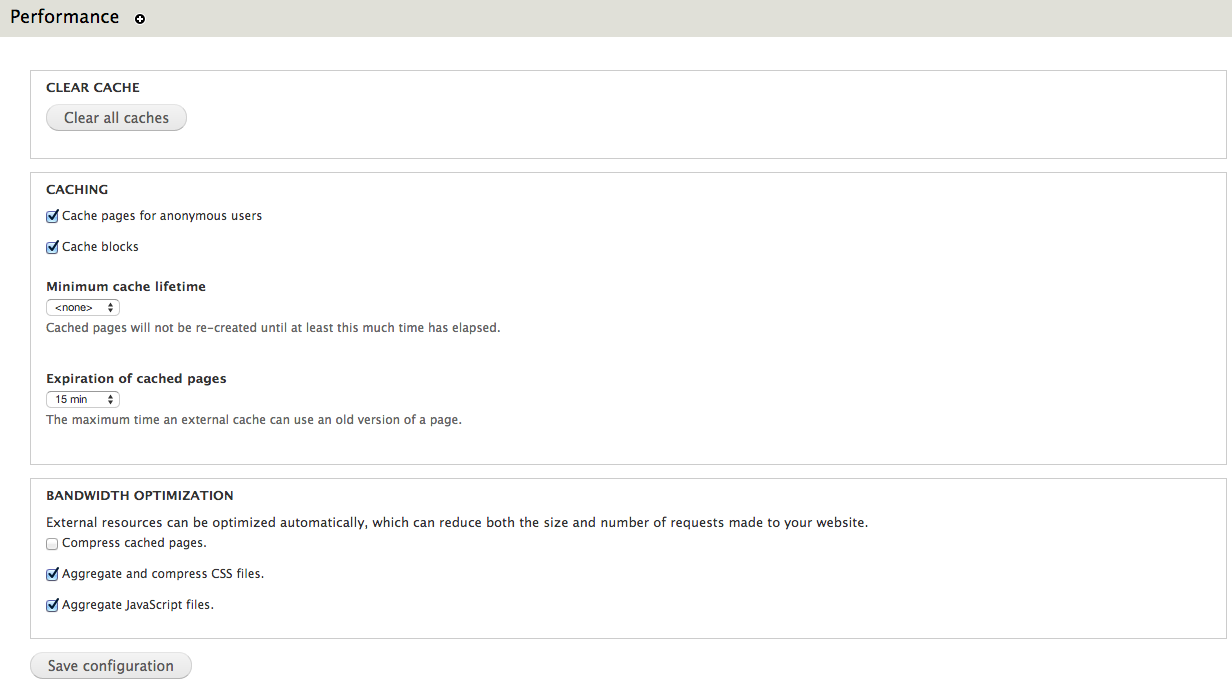
It’s important to clear caches every time you run a new performance test to be sure that you don’t have cached pages. Just press “Clear all caches” button.
Testing the performance of Drupal-based platforms
Now it’s time for performance testing using Load Impact. Create a user account if you don’t already have one.
After that visit “My tests” to start creating your performance test and press “Start a new test” button. This will execute a rather small test of 50 concurrent users for 5 minutes.

Type your test page URL into the text box and press “Start test” button.
You can also configure a larger test from the “Test configurations” page (e.g. with ramp-up/down; additional IPs, multi-geo load generation; mobile network emulation, server metrics, etc.)
![]()
The test will start and you will see how Load Impact is creating requests from different hosts.

Pantheon results
The following are the performance test results for the same Drupal site (using the same configuration and number of content nodes) hosted in Pantheon and Aberdeen Cloud platforms and a Virtual Private Server:

Pantheon results (user load time)
Aberdeen Cloud

Aberdeen Cloud results (user load time)
VPS (CPU: 1.5 Ghz. – RAM: 1 Gb.)

VPS results (user load time)
You can observe that Pantheon keeps user load time between 1.5 and 3 seconds, meanwhile with Aberdeen Cloud platform and the VPS, the user load time stays between 3 and 4 seconds.
Based solely on these few simple load tests, it seems Pantheon manages to serve Drupal pages at least one second faster than the other tested platforms.
Now it’s time for you to try different configurations for the Drupal site, like number of content nodes, disable caching or file aggregation and see how it affects performance and scalability.
Read more about load and performance testing with Pantheon: http://helpdesk.getpantheon.com/customer/portal/articles/690128-load-and-performance-testing
——–
This blog post was written by Ruben Teijero. Follow the Load Impact blog (see below) for more great articles by Ruben and many other fantastic developers, testers and operations pros.


